


Your Guide to Setting Up the Waterfed Poles Kit

Product Components
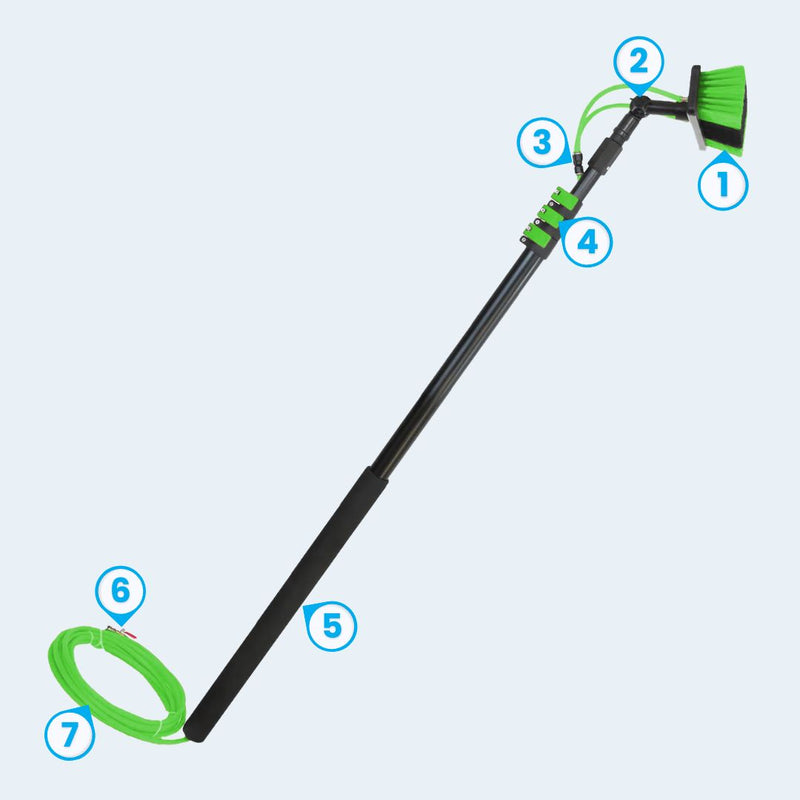
11" Brush Head: Comes with 2 barbed brass nozzles and the bristles are made with firm nylon.
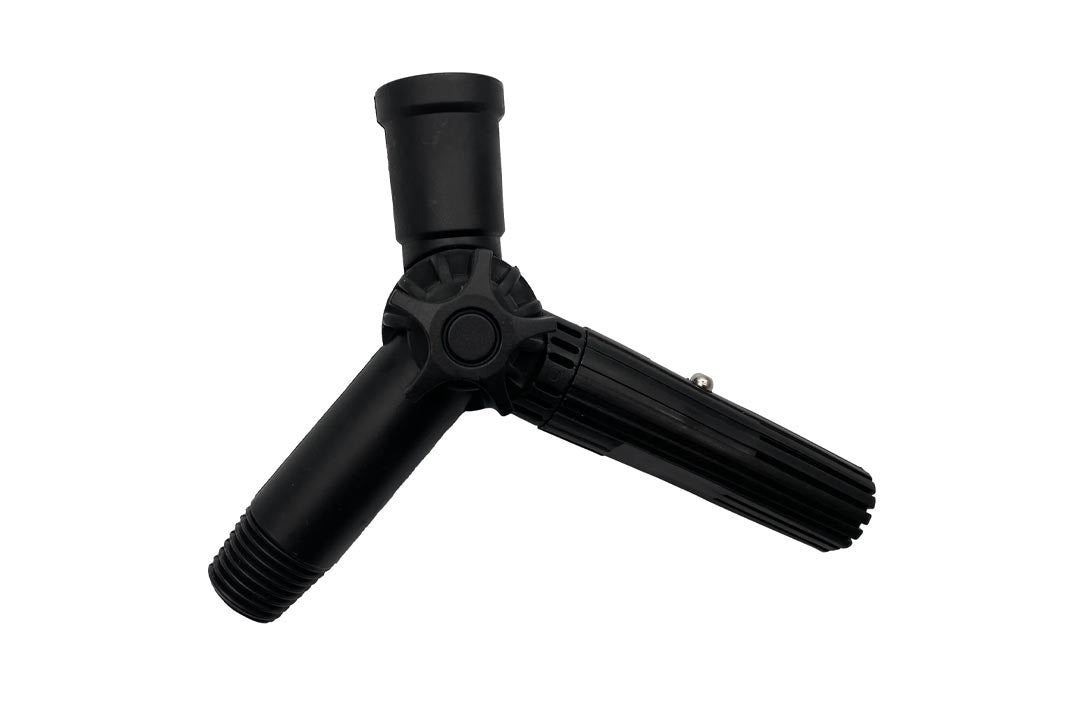
Gooseneck Connector: Adjusts to any angle for hard-to-reach areas. Made with durable heavy duty plastic.
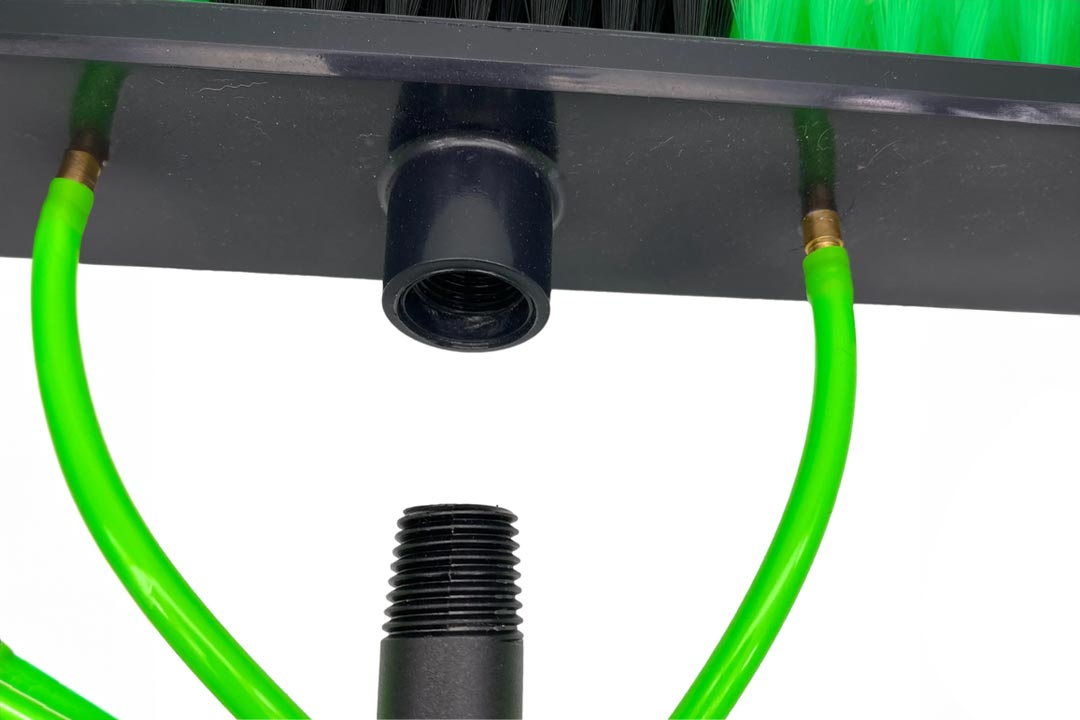
Y-Connector: This connector is made to last and helps the water pole and short hoses fit together without any leaks.
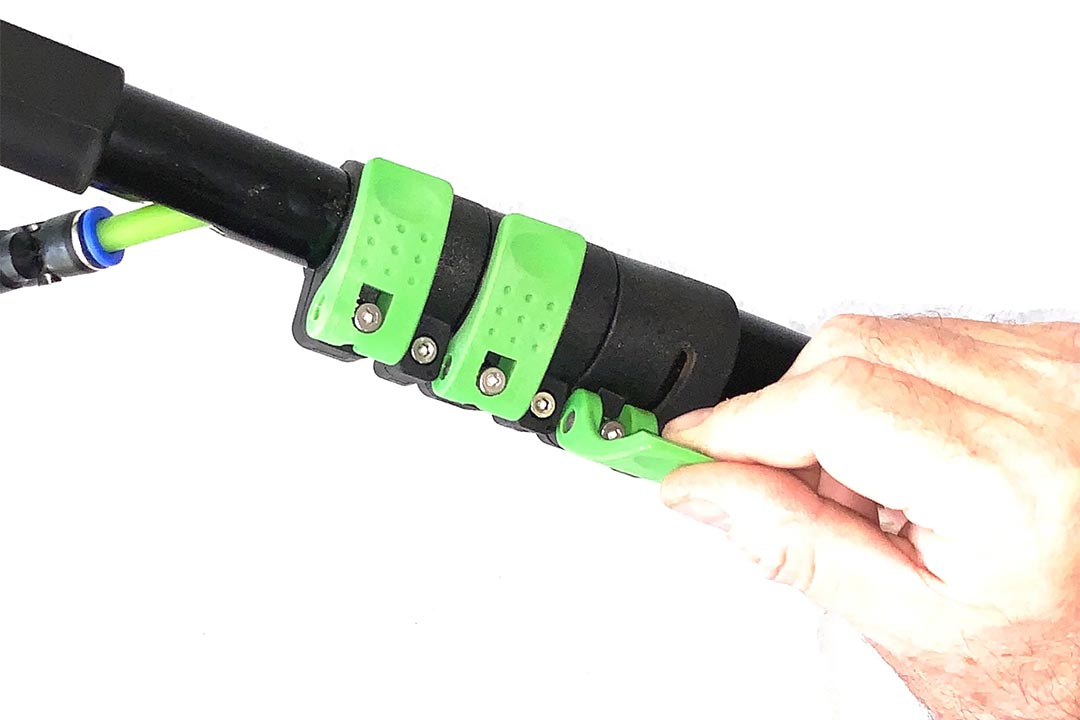
Adjustment Clamps: Allows for easy adjustment and secure locking of the pole's length.
Foam Comfort Handle: Designed for user comfort and grip during extended use.
Shut-off valve with Brass connector: Efficiently managing water flow and easily connect/disconnect to your faucet.
Hose: Designed for maintaining optimal water flow from the source to the pole's brush head.
How To Assemble
-

STEP 1
Attach the short hoses into the brass nozzles on the brush head.
-
STEP 2
Then, take the angle adapter or gooseneck (adjust to your desired angle).
-

STEP 3
Attach the Brush Head to the gooseneck, making sure the top of the brush aligns with the top of the adapter.
-

STEP 4
Take the female coupling, pull back on the housing and insert the male brass shut off valve. Make sure that you push the shut off valve firmly into the coupling until it clicks.
-

STEP 5
Rotate the red handle of the brass valve to the side to close and push back to open.
-
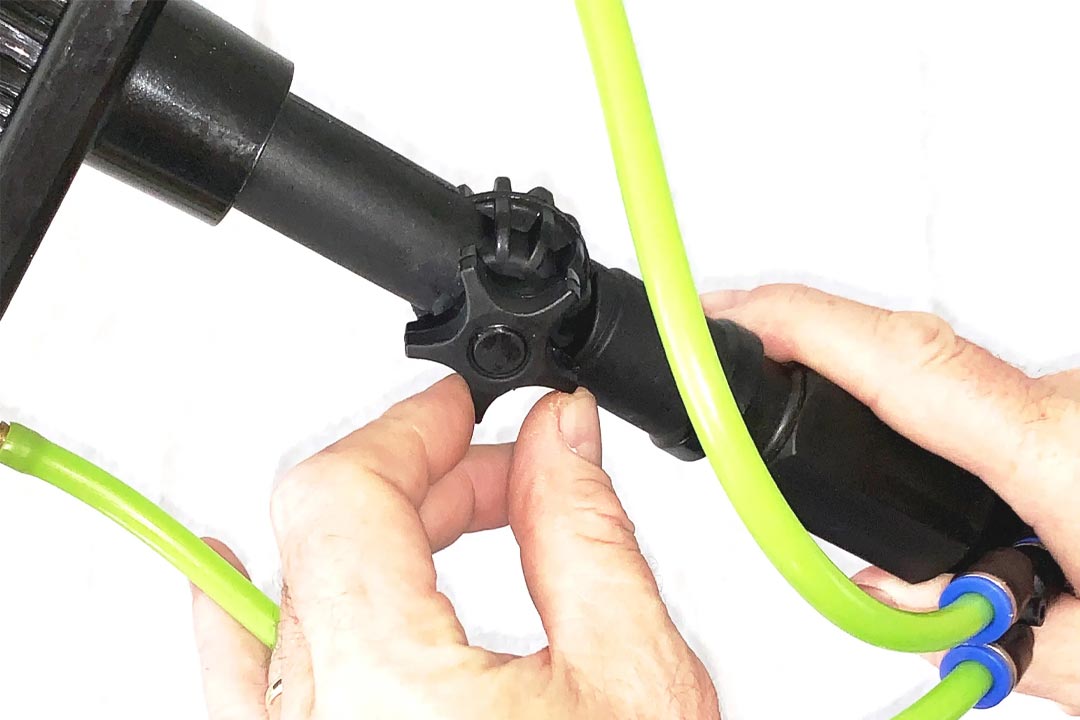
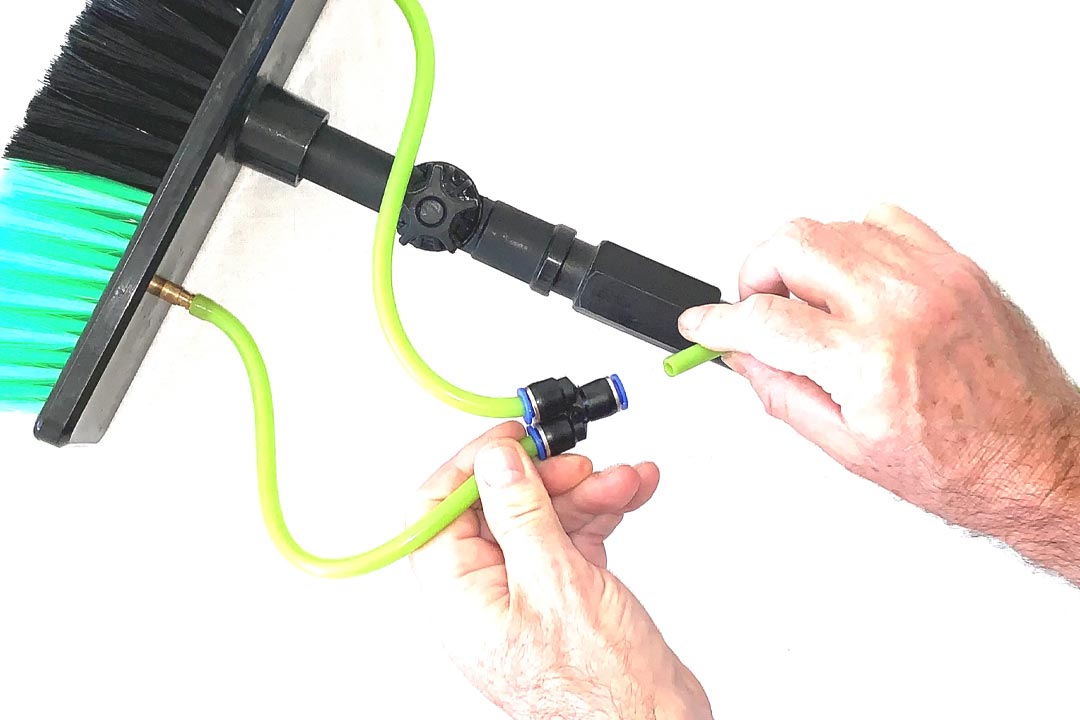
STEP 6
To attach the brush onto the pole, simply screw the gooseneck to the top end of the pole and connect the Y-connector to the hose by pulling back the blue locking collar.
-
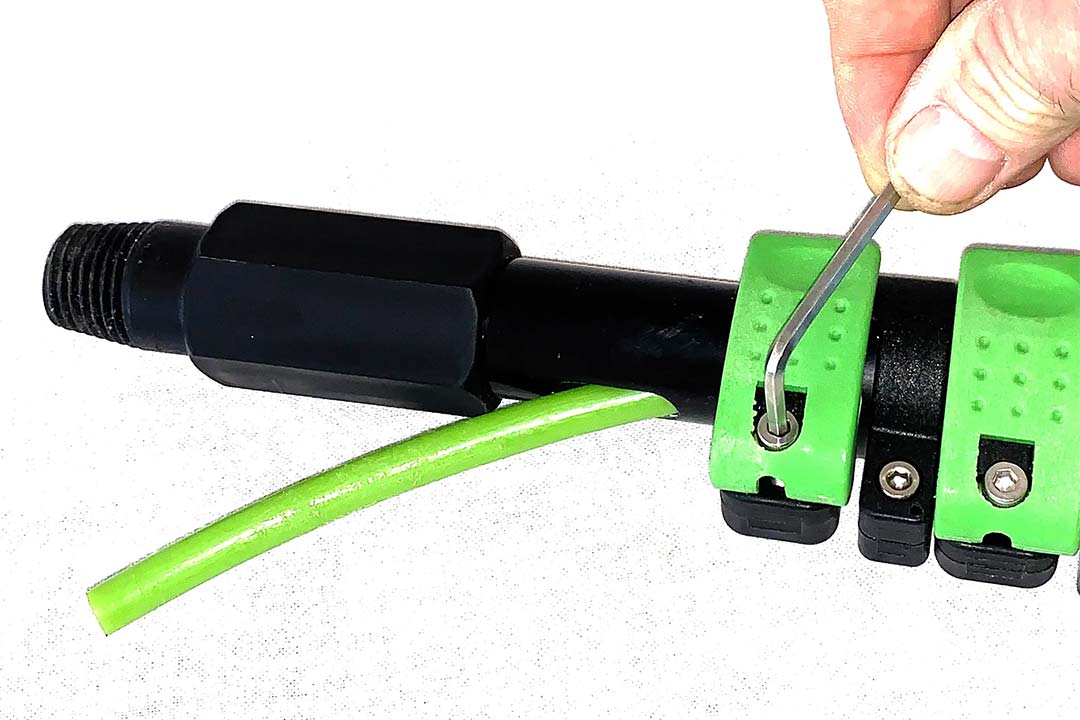
STEP 7
Prior to extending the poles, ensure that the clamp screws are tight. Use the included hex key to tighten any loose screws until they are hand tight. This will ensure that the clamp securely holds the pole in place when it is extended.
-
STEP 8
To extend the pole lift the green handle on the clamp, extend the pole to the required length and press the clamp closed.


Attaching The Brush Head and Optional Squeegee
-
STEP 1
The double gooseneck has a star nut that allows you to adjust the brush to your desired angle.
-
STEP 2
Attach the double gooseneck into the brush.
-

STEP 3
Screw the connector tip to the double gooseneck.
-

STEP 4
Insert the squeegee, insuring the button aligns with the slot.
-
STEP 5
Then, attached the brush head and squeegee onto the pole.
-
STEP 6
Connect the hose onto the Y-connector.


Do's And Don'ts
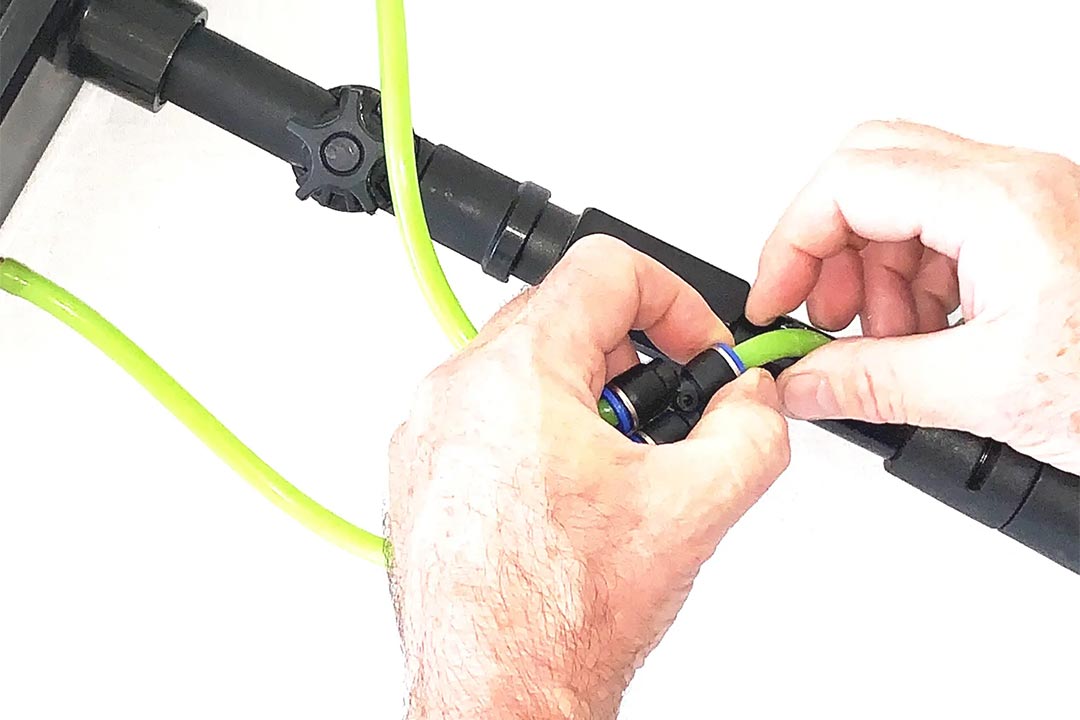
-
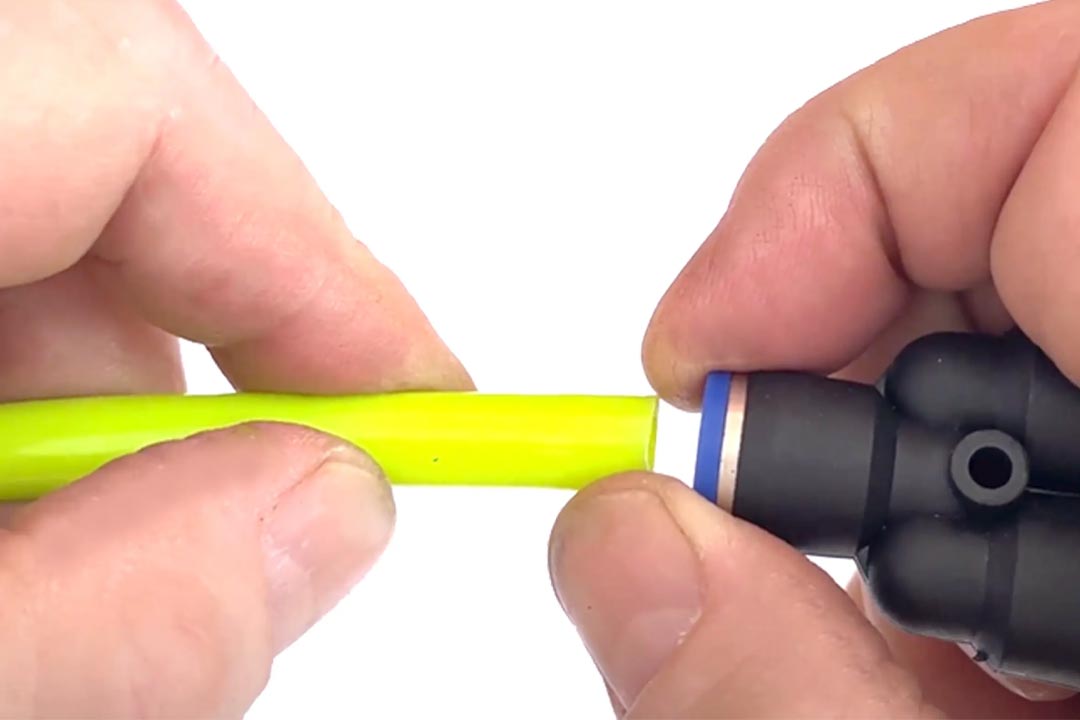
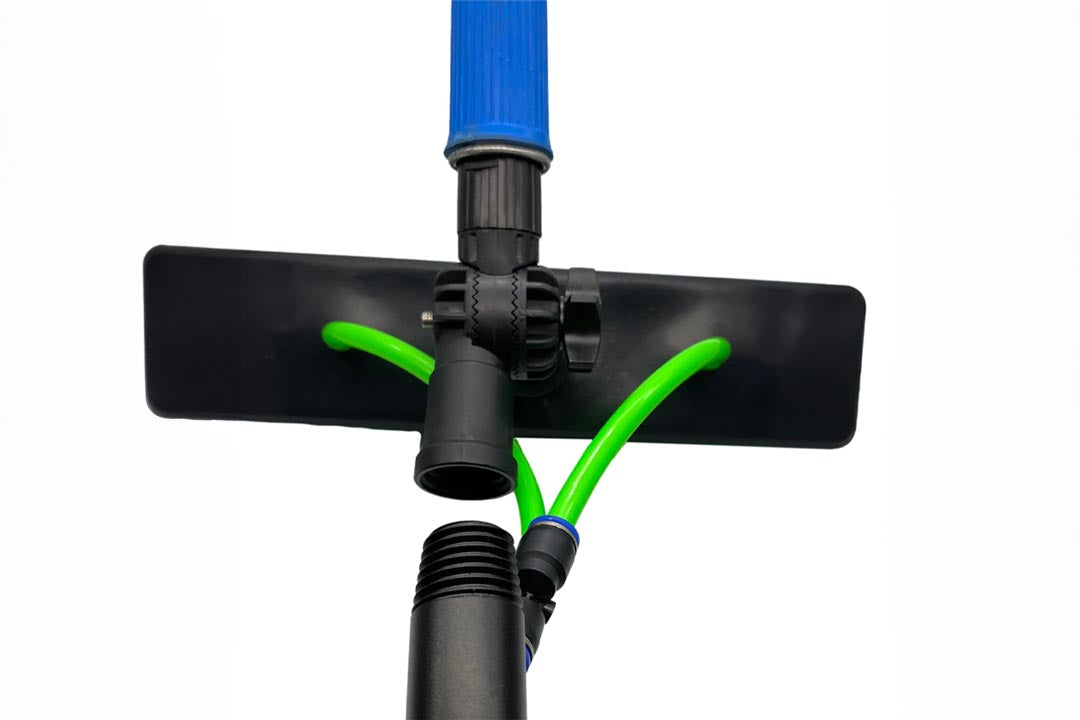
Attaching the hose onto the Y-connector
When attaching the hose to the Y-connector you must pull back the blue locking collar and insert the hose.
-

Pulling the hose from the bottom of the pole
When retracting the pole, it is important to gently pull the hose from the bottom to prevent it from bunching up and getting caught inside the pole, it is helpful to have two people.
-
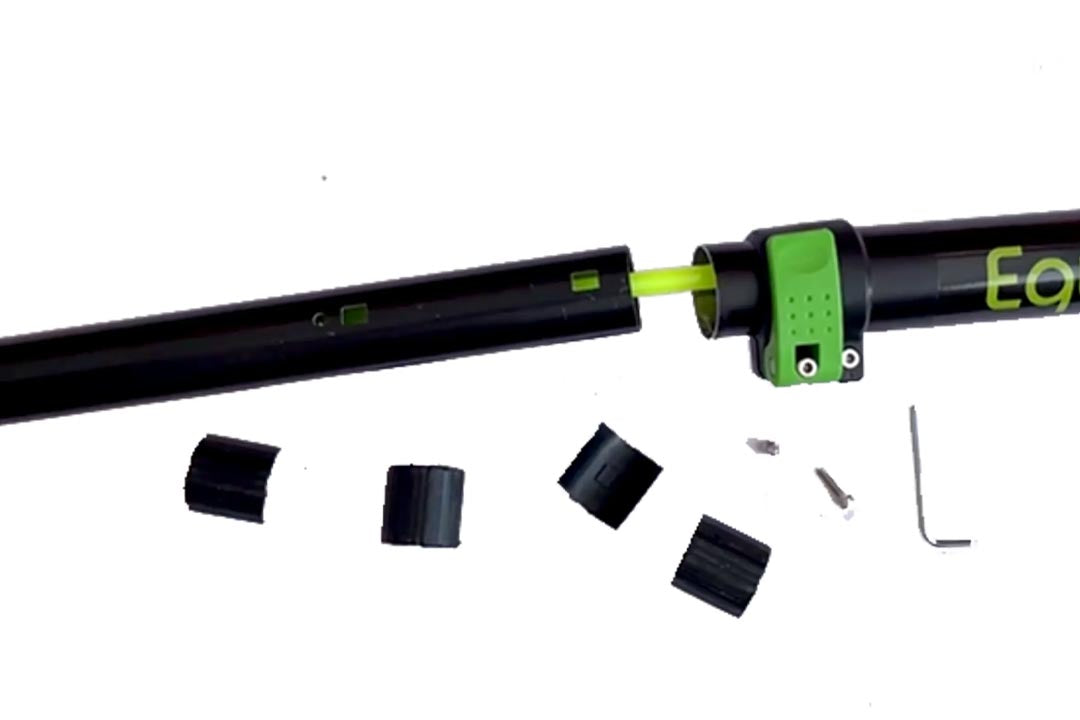
Don't overextend your pole
It is important to remember to NOT OVEREXTEND THE POLE or the spacers will fall out.
-
Put the spacers back onto the pole
If the pole is overextended and the spacers fall out, simply put the spacers back onto the pole. You'll notice that it has a square shaped hole. The square shape on the spacers fit into the hole.
-
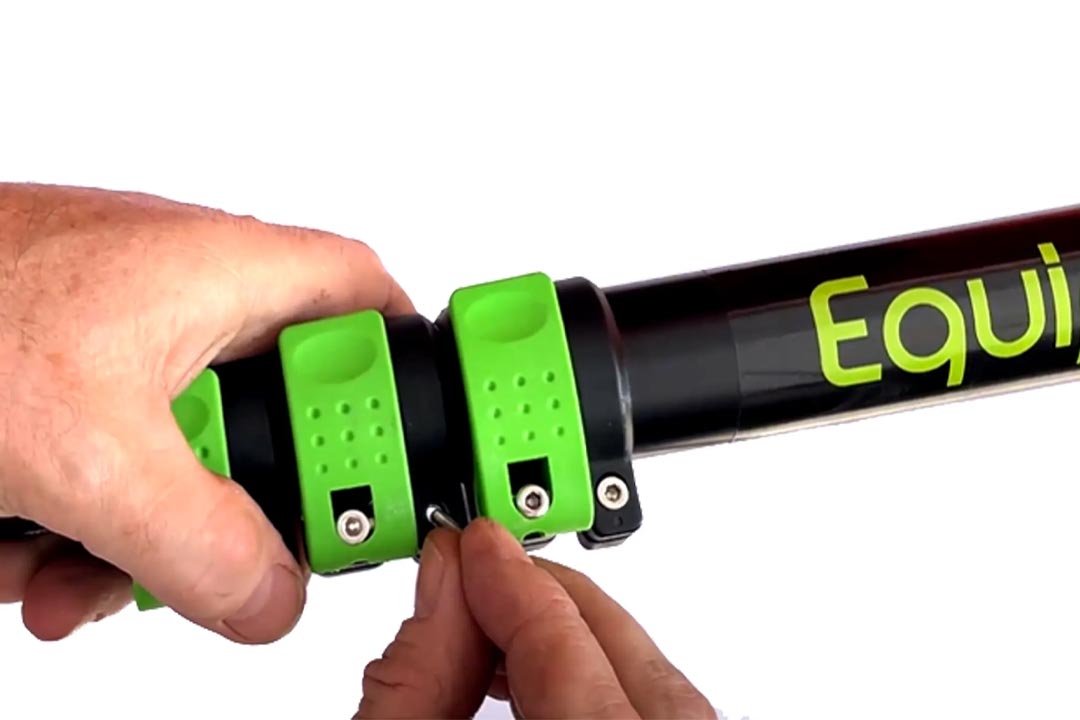
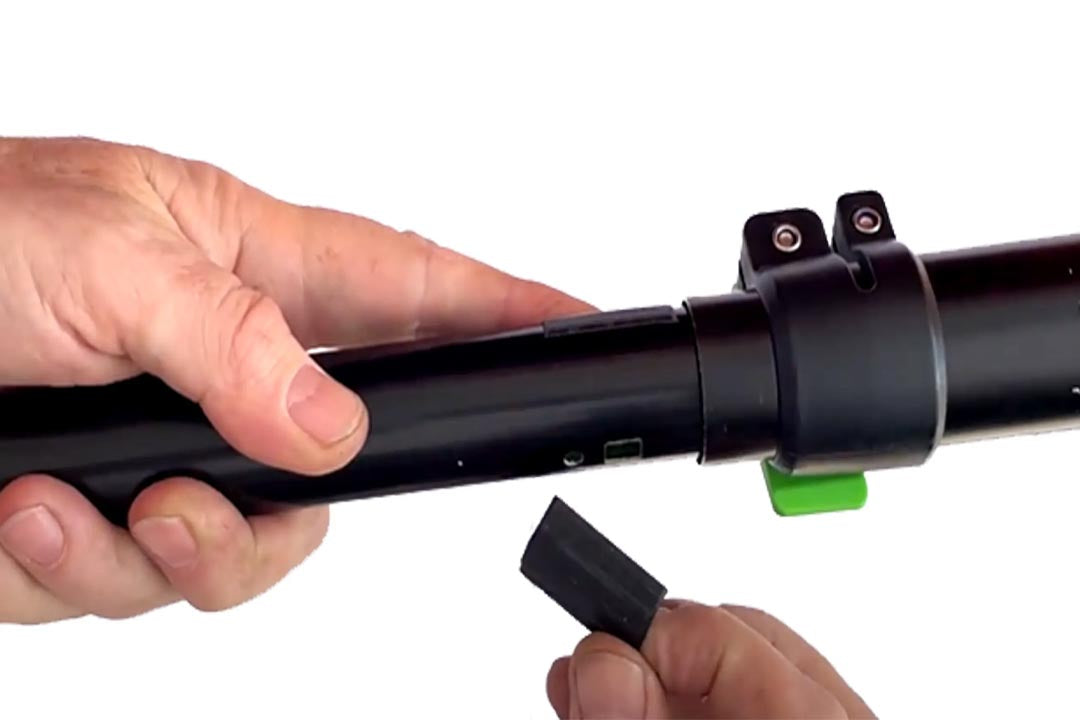
Putting the hex screws back onto the locking clamp
If the hex screws fall out or are accidentally removed, you can simply put back the screws into the locking clamp, and use the hex key to tighten the screws back onto the clamp.


-

Warranty
We provide One (1) year warranty for parts & accessories & housing from the date of purchase.
-
Returns
We accept returns within 30 days of the shipment receipt. Get in touch to learn more about the return instructions.
-
Contact Us
Call us on 01604-968700, Monday - Friday | 9AM - 5PM or email us at service@equipmaxx.com